How To Repair Cracks

Cracks must be repaired immediately when observed otherwise the life of structure will reduce causing structural failure. They not only weaken the building but spoil the beauty of walls also. This write up tells you about repair of cracks in plaster, RCC member, Brick walls, Floor and Fine Cracks.
The cracks can be prevented at the time of construction. To know more about prevention of cracks during construction, click at the link below.
Repair Cracks in Plaster
Two types of cracks are found on surface of plaster i.e. A. Crack with hollow sound in plaster. B. Crack with no hollow sound in plaster. Hollow sound can be checked by striking the plaster.
A. Repair cracks giving hollow sound
Remove plaster applying proper cut
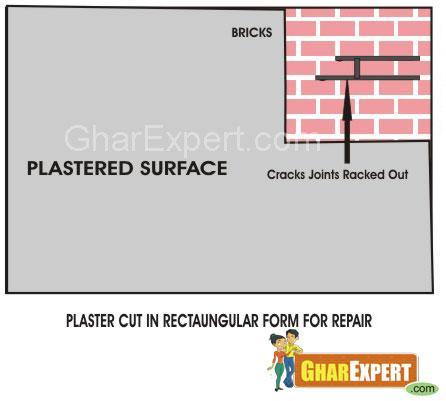
Defective plaster should be removed and the edges should be slightly cut in square or rectangular shape to provide a neat joint.
Prepare the surface thoroughly
Clean the surface with wire brushes and wash it. Wet the surface 24 hours before application of cement mortar.
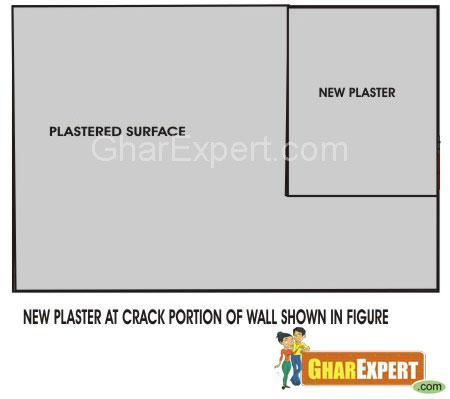
Apply fresh cement mortar and finish the surface
Defective portion should be filled in with cement mortar. Keep the surface wet at least for 3 days. When surface is dry, finish it according to adjoining area on the wall.
B. Repair cracks if it is solid without hollow sound
Clean cracked portion of all loose materials and fill crack seal sealants in cracked portion. Finally finish the surface according to adjoining area.
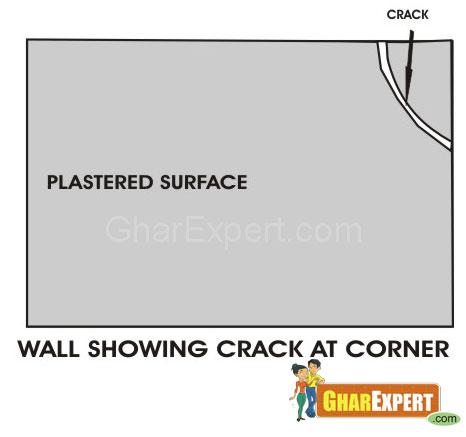
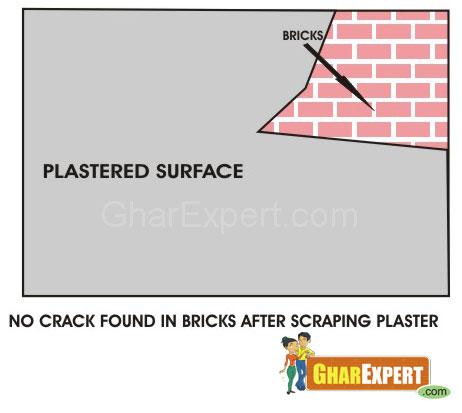
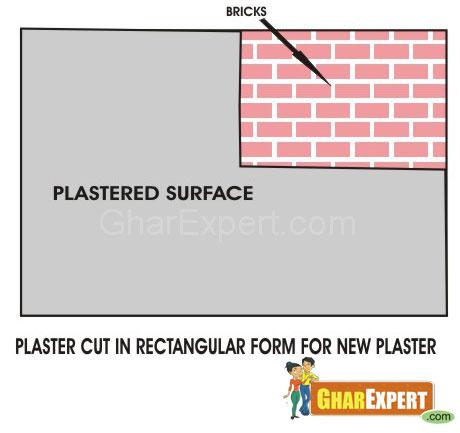
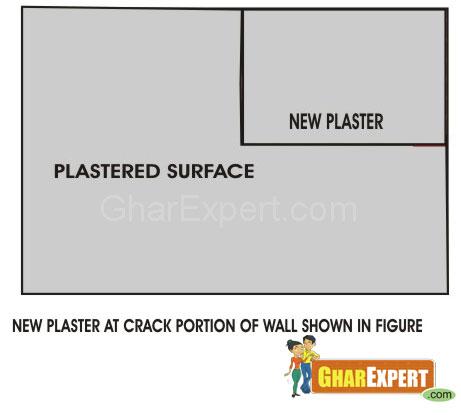
NOTE: Plastering is done after cleaning. To know the process of ‘Plastering’ click on the link
Repair Cracks on RCC Surface
Clean cracked portion and apply guniting
The cracked portion should be widen gently and be cleaned of all loose materials. Fill the cracked portion by pressure grouting or ‘guniting’. The material for such grouting can be epoxy or cement (with suitable admixture).
Apply epoxy and finish the surface
Epoxy has more strength and adhesion than cement and can go into very thin cracks as fine as 0.1 mm. The surface should be finished according to adjacent area on the wall.
Note: The cracks in RCC members/ structural members should be repaired immediately with consultation form structural engineer/professional.
Repair Cracks on face of plaster
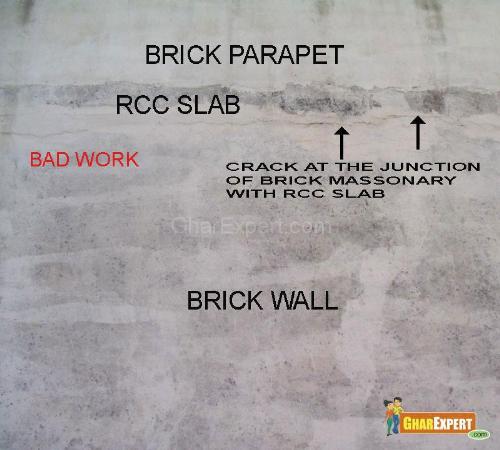
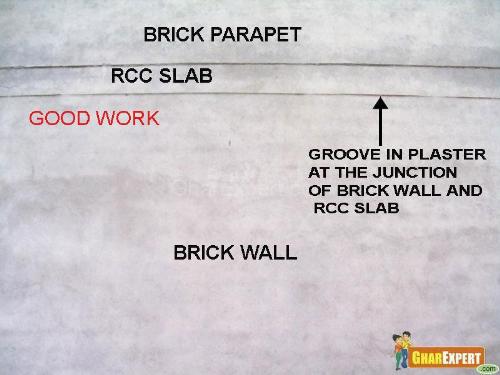
When two components having different elastic properties such as RCC slab and brick work abating each other, the crack on face of plaster is formed between these components due to their thermal expansion.
Remove plaster and old material
The plaster should be removed from cracked portion. The joints should be widened at least 20 mm to 25 mm in thickness. Clean old material by washing and brushing.
Apply cut and prepare the surface
Apply slight cut on edges in straight line to provide neat joint. Make the surface damp 24 hours before application of new plaster.
Apply cement mortar
Cement mortar should be applied on defective portion. Make 20 mm wide and 25 mm thick groove at the junction of two materials/components.
Do curing and finishing
Keep the surface wet at least for 3 days. When surface is dry, finish it according to adjacent area on wall.
Repair Cracks in Masonry Walls
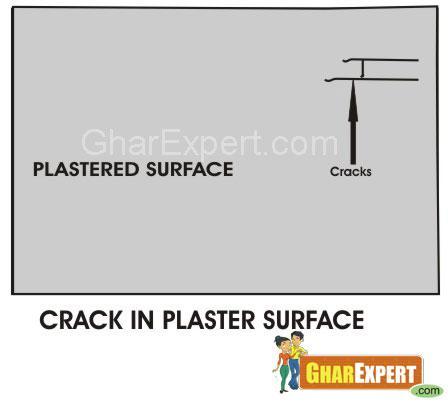
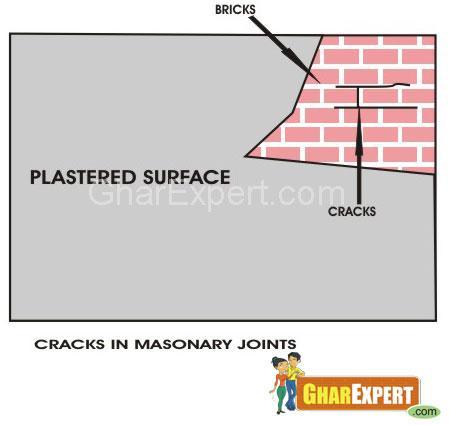
Two types of cracks are seen in masonry walls i.e. A. Crack in mortar joints of walls. B. Crack in bricks/Diagonal Cracks
A. Repair cracks in mortar joints of walls
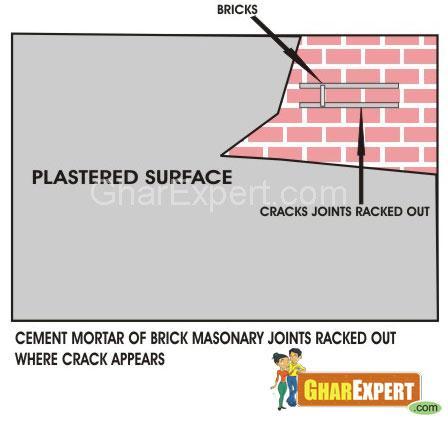
Remove mortar
The mortar should be removed from cracked joint with the help of iron tools at least up to 25 mm depth. All loose material should be cleaned from cracked portion.
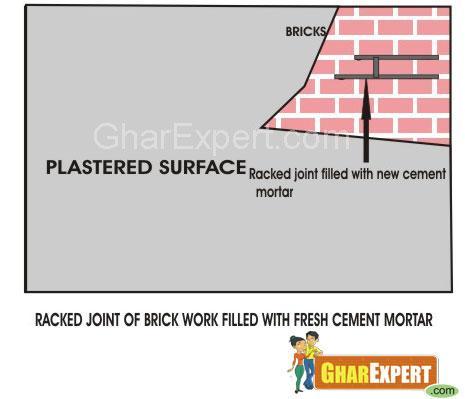
Wet the surface and apply cement mortar
Cracked portion must be kept moist at least for 24 hours before doing repair. Fill in the joints with cement mortar of coarse sand in 1:4.
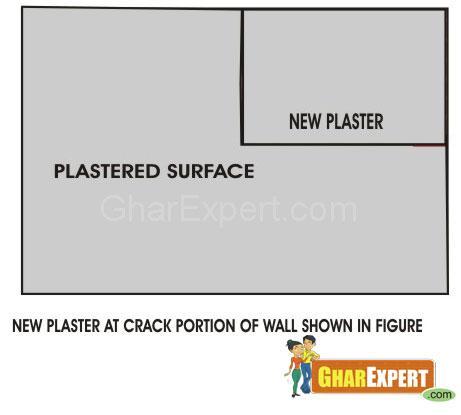
Do curing and finishing
After filling the joints with cement mortar, keep the repaired surface wet at least for 3 days. After drying the surface, finish the repaired area according to the adjoining area.
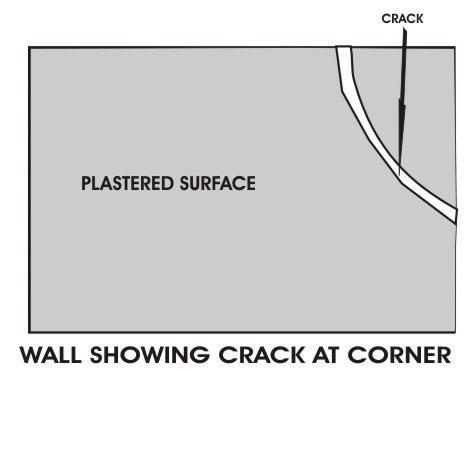
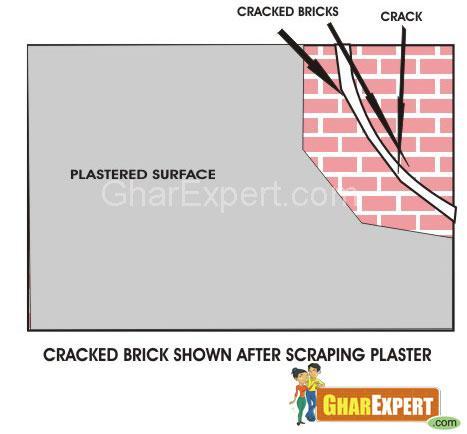
B. Repair cracks in bricks/diagonal cracks
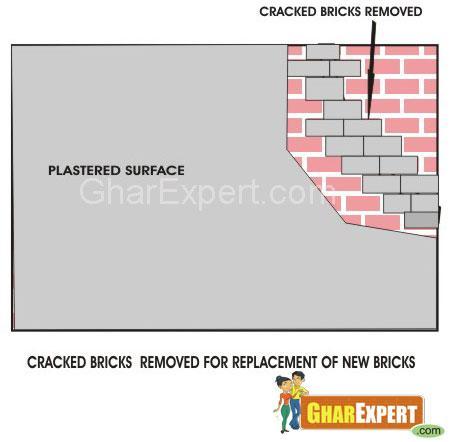
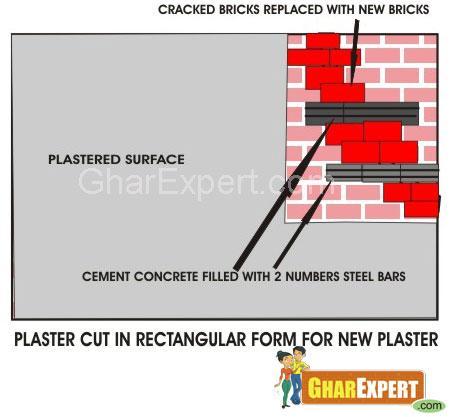
Remove broken bricks
Before doing any repair of cracks, make sure that the cracks are stabilized and are not widening further. Remove broken bricks by scratching cement mortar from the joints gently.
Prepare the surface
All loose material should be cleaned from the portion by brushing and washing. Wet the surface 24 hours before application of new plaster.
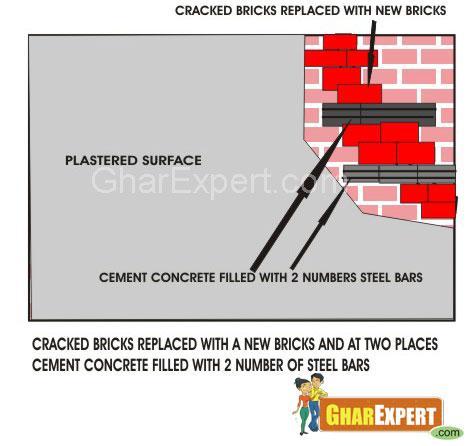
Fix new bricks thoroughly
Lay fresh cement mortar with coarse sand in 1:4 and fix new bricks. Fill all joints around bricks with mortar tightly with the help of iron tools.
Do curing and finishing
The repaired surface should be kept moist up to 7 days. When surface is dry, it should be finished according to adjoining area.
Repair Cracks in Floor
Remove loose material and apply mortar
Create V shape groove in cracked portion and remove all loose material by washing and brushing. Fill in the groove with polymer modified mortar (for wide cracks) or with polymer modified cement grout (for thin cracks).
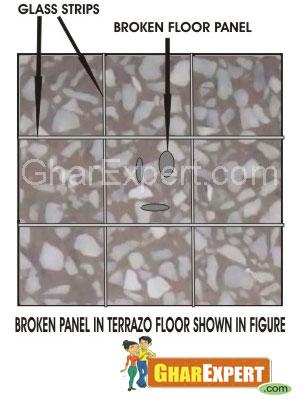
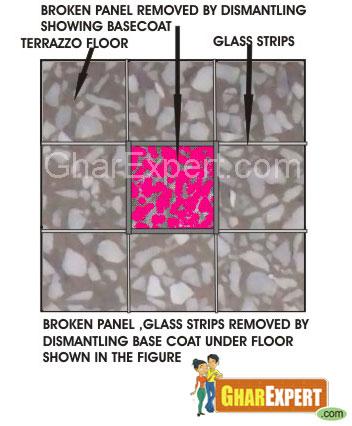
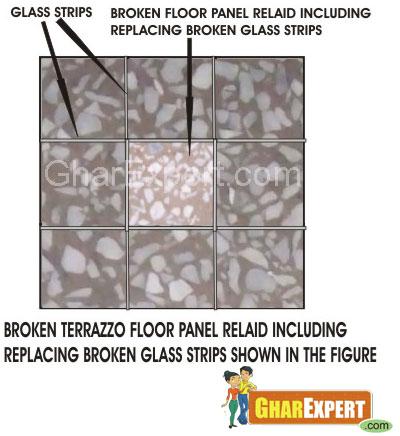
Remove cracked panel or material
If there are many cracks in the floor, remove cracked panels and old materials.
Prepare the surface and lay new panel
Clean the panel by washing and brushing. Prepare floor material according to the existing floor and lay new panel.
Note: To know more on ‘How to Lay Floor’ in detail, you can click at the link given below on our website.
Repair Hair Cracks in plaster
Broaden the crack gently
Widen the crack about ¼ inches with chisel and remove all loose plaster from the cracked portion.
Apply vinyl spackle compound
Use vinyl spackle compound to fill the cracked portion. Press the vinyl spackle into the crack and let it dry. Sand or sponge the surface smooth.
Seal the patch and finish the surface
Seal the patch with proper priming coat and finish it with proper shade according to the adjoining area.
Repair Fine cracks
- Apply surface water proof coating on the entire area having very fine cracks (especially on roof) where filling /sealing of each individual crack is not possible.
- Do proper curing of repaired area at least for 3 days.
 Cracks in building are a common occurrence and it is important to understand the causes and the measures to be taken for their prevention.Materials such as bricks,mortar and concrete, which contain considerable quantity of water at the time of construction, dry out subsequently and under go major contraction.
Cracks can happen due to foundation movements and settlements of building, thermal movements, chemical reactions, elastic deformations and shrinkage etc. in buildings. They can damage plaster of walls, ceilings and destroy the beauty of the structure also. Let’s know their reasons in detail and get preventive measures.
.Better roof covering materials are required to avoid cracks.
. Proper curing of cement is necessary.
The cracks are repaired by using low-pressure injection of epoxy or polyurethane foam repair material.
.Bricks should be well burnt.
.Plaster with coarse well-graded sand or stone chips is used to minimize shrinkage cracks.
To avoid cracks, Earthen Plastering is applied. Clay in Earthen Plasters is Hygroscopic (water absorbing). Earthen walls can help to temper interior humidity.
A slab is a single layer of concrete which is several inches thick.The slab is poured thicker at the edges to form an integral footing reinforcing rods strengthen the thick edge.
The best DPC is of plastic membrane placed across the whole width of the wall to its full length
Which type of cement is recommended for protection from the cracks for construction of the building?
When the use of bricks containing excessive quantity of soluble sulphates is unavoidable, content of cement in mortar should be increased or super-sulphate cement should be used.
 Kota stone flooring is a subtle blend of grandeur and luxury giving the interior and exterior a gorgeous look.......
 To get maximum ventilation and natural light in your house, make sure the building is properly oriented. Orientation of building saves energy and provides comfortable living as well. This article tells you about various factors and benefits of building orientation.
 Preview some of the most impressive pictures of kitchen from GharExpert Gallery.
 A solid roof on building is very important for everybody living in the house. The roof should be constructed in a way that assures you great safety. Here are given details about different types of roofing.
 Frames of doors and windows are most important parts of your doors and windows. They are available in different size, height, width and shapes. Frames hold locks and hinges and support door and windows to shut and open easily. Here is what you need to know about different doors and windows frames.
 Different steel bars are recommended for their relative tensile stresses.Steel bars are major components of construction.Here is what you need to know about steel bars (Sariya).
 Brahmasthan is a powerful zone of the house. It should have open space for flow of energy in the house. The positive energy is very useful for living beings of the occupants of the house.
 Brick work is an important part of construction work done with the help of bricks and cement mortar. It is done with different quality of bricks with different ratios of cement mortar according to the requirement.
 Are you remodeling your bathroom? Bathroom shower doors make your bathroom a style icon. Read the following article that will help you select the bathroom shower door that will exactly suit your bathroom.
 Living room or Drawing room should be located in east or north direction. The ideal location of a living room depends on plot facing.
Without knowing perfect mixture of cement and sand you can not achieve your goal.

Repair cracks

Repair Exterior Wall Crack

old industrial mild steel chimney repairing work

Air Conditioning Repair

Types of Cracks in the Building

Cracks in Building

Cracked shower tiles

Crack In Wood

How to prevent cracks in building

Crack in wall

Cracks

Good cracks

Crack in plaster

Cracked surface

Crack in Plaster

Crack in Masonary

Diagonal Crack

Cracked Bricks Removed

Cracked Tile

Cracked Tile Removed

Repair cracks

Repair Exterior Wall Crack

Types of Cracks in the Building

Cracks in Building

Cracked shower tiles

Crack In Wood

How to prevent cracks in building

Crack in wall

Cracks

Good cracks

Crack in plaster

Cracked surface

Crack in Plaster

Crack in Masonary

Diagonal Crack

Cracked Bricks Removed

Cracked Tile

Cracked Tile Removed

Marble Stone - Crack
Copyright 2007-
GharExpert.com All rights reserved.